> For the complete documentation index, see [llms.txt](https://help.checkoutchamp.com/llms.txt). Markdown versions of documentation pages are available by appending `.md` to page URLs; this page is available as [Markdown](https://help.checkoutchamp.com/crm/gateway-setup/gateway-integrations/wellnesspay.md).
# WellnessPay
{% hint style="info" %}
WellnessPay will work with Checkout Champ pages and landers that connect to Checkout Champ via Direct API. It will NOT work with Order Entry.
{% endhint %}
{% hint style="warning" %}
No credit card details are stored with WellnessPay. The customer is redirected to WellnessPay to complete the checkout.
Subscription billing (recurring orders) is not supported.
{% endhint %}
**STEP 1**
To activate WellnessPay, go to **Checkout Champ | Gateways | Gateway Integrations** and select the WellnessPay tile. Click the + **Activate** button.
**STEP 2**
Enter **apiKey** in the General Details Section of the Gateway Creation Screen. **apiKey** is obtained from your WellnessPay gateway account.
Enter **Title** and **Descriptor**
Click the **Create Gateway** button to save your changes and create the gateway.
**STEP 3**
{% hint style="info" %}
This step can be ignored if using Checkout Champ hosted pages
{% endhint %}
The Checkout page must be secure HTTPS. A non-secured call to the WellnessPay gateway will be rejected.
Pass paySource=PREPAID and prepaidType=WELLNESS on the import order API call from your checkout page
One option is to use hidden input fields on the page
```
```
**STEP 4**
{% hint style="info" %}
This step can be ignored if using Checkout Champ hosted pages
{% endhint %}
The checkout page must handle standard 3DS processing
[Direct API 3DS Instructions](/crm/gateway-setup/direct-api-3ds-instructions.md)
***
### Checkout Champ Pages Only
Go to funnel Settings > Alternate Payment Methods > Wellness Pay. Choose the WellnessPay gateway created in earlier steps. Save.
There are 2 options on Checkout pages
Option 1 - button
Drag a WellnessPay button to the page. Save the page.
Return to the funnel canvas. Select the WellnessPay button on an arrow leaving the page. Then publish.
Option 2 - radio
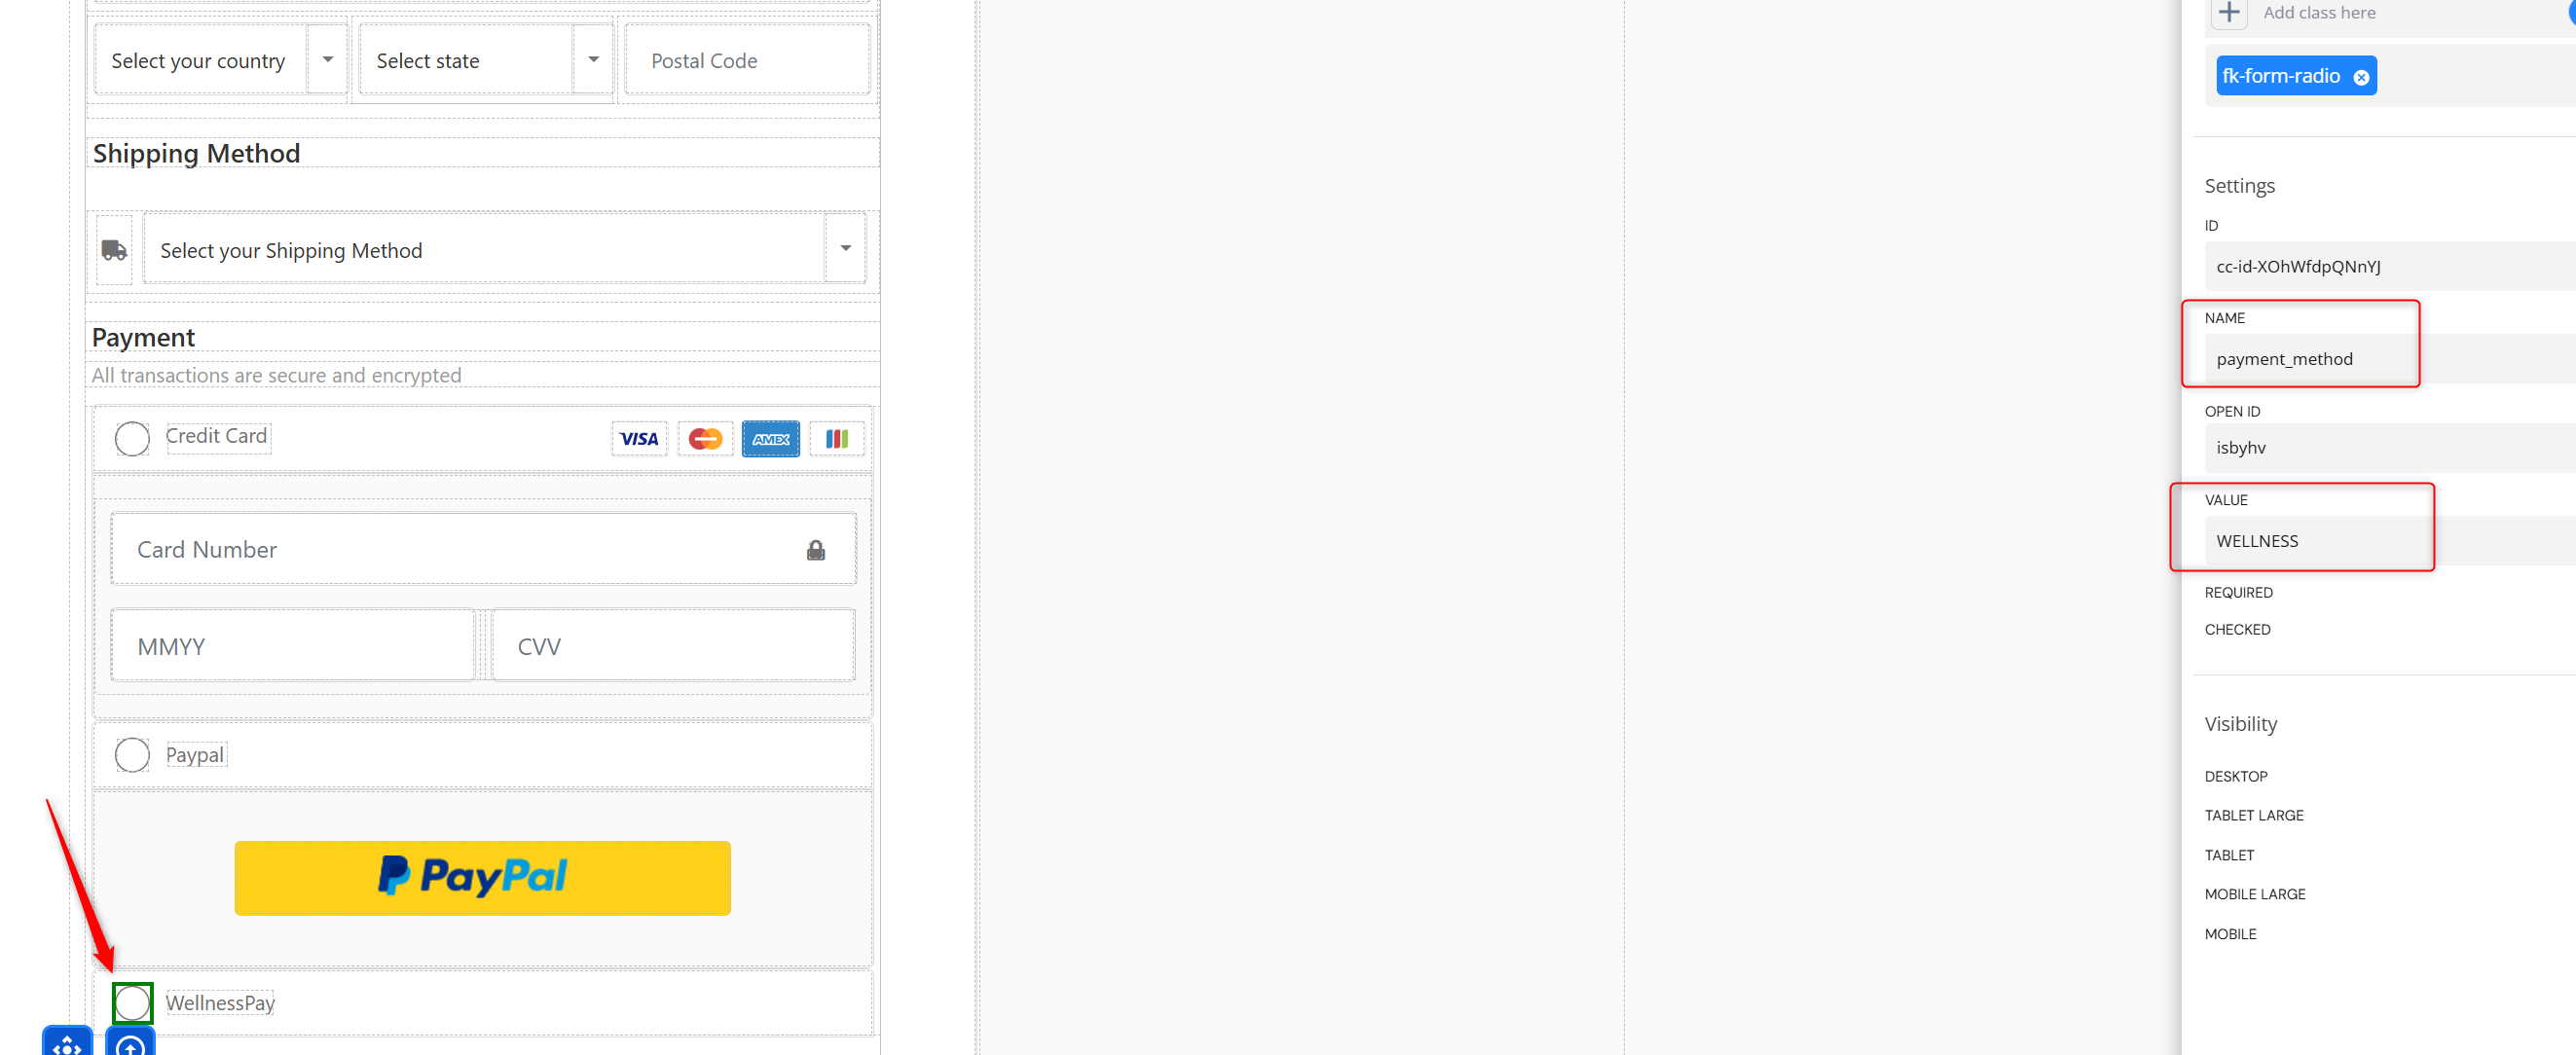
Add a radio button onto the checkout page's payment method selector. Drag a Radio Button element from the Blocks Menu onto your Checkout Page
Select the radio button. Go to Settings. Set Name to `payment_method` and Value to `WELLNESS`. This may also be used with a payment toggler. Use Name `fk-payment-option-toggler` instead.
Save and publish.