# Afterpay

{% hint style="warning" %}
**Disclaimers:**

* ***No card details are stored for merchants using Afterpay’s Payment Gateway***
* ***Afterpay will only work for one-time purchases and will NOT support one-click upsells nor recurring billing/subscriptions***
* ***You can enable the “Multi-Pay Rebills” setting which will require a credit card on the checkout pages to accept one-click upsells and recurring payment***
* **Customer info fields are required for this alternate payment method.**
  {% endhint %}

{% hint style="info" %}
Afterpay is supported on Afterpay, Adyen V2, and Stripe V2 gateways
{% endhint %}

{% hint style="info" %}
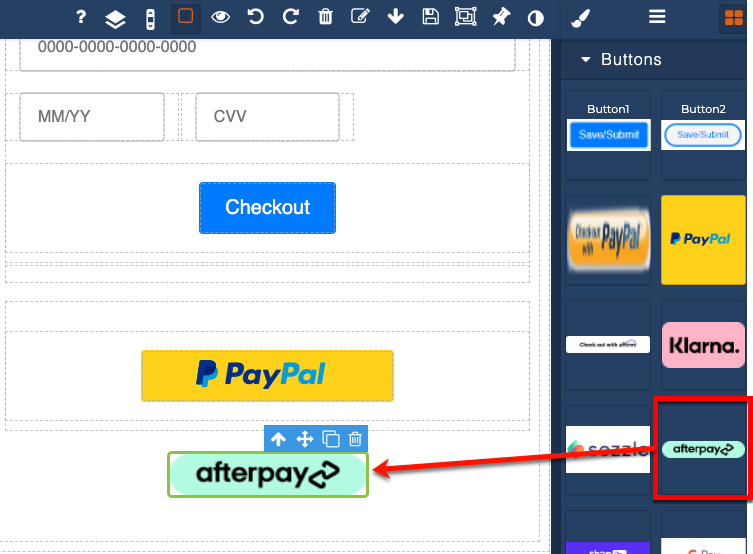
**Clearpay** is also supported. Please follow the same documentation using Afterpay and drag on the Clearpay button instead of the Afterpay button on step 6.
{% endhint %}

<figure><img src="/files/bIq0bCNxy2nAJMnevcI1" alt=""><figcaption></figcaption></figure>

***

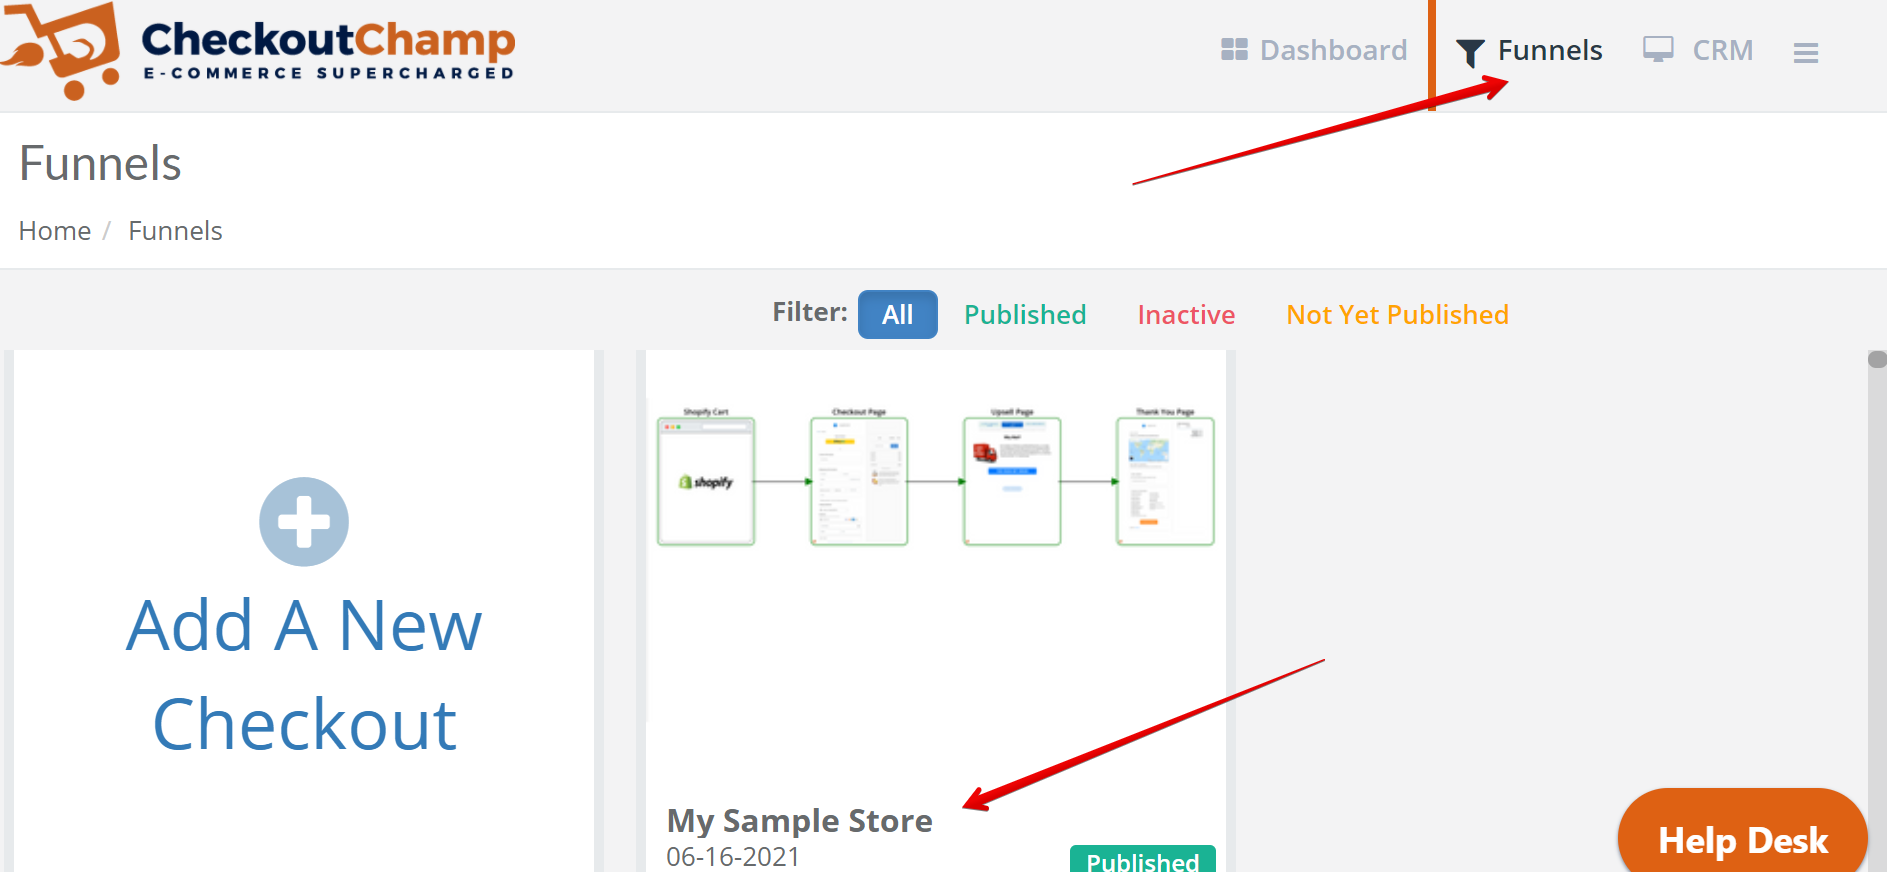
### Step 1: Login and navigate to the funnel you’d like to add Afterpay to <a href="#afterpay-checkoutchamp-step1-loginandnavigatetothefunnelyoudliketoaddafterpayto" id="afterpay-checkoutchamp-step1-loginandnavigatetothefunnelyoudliketoaddafterpayto"></a>

<figure><img src="/files/jjhmZONMsVsvtUZlKJDE" alt=""><figcaption></figcaption></figure>

***

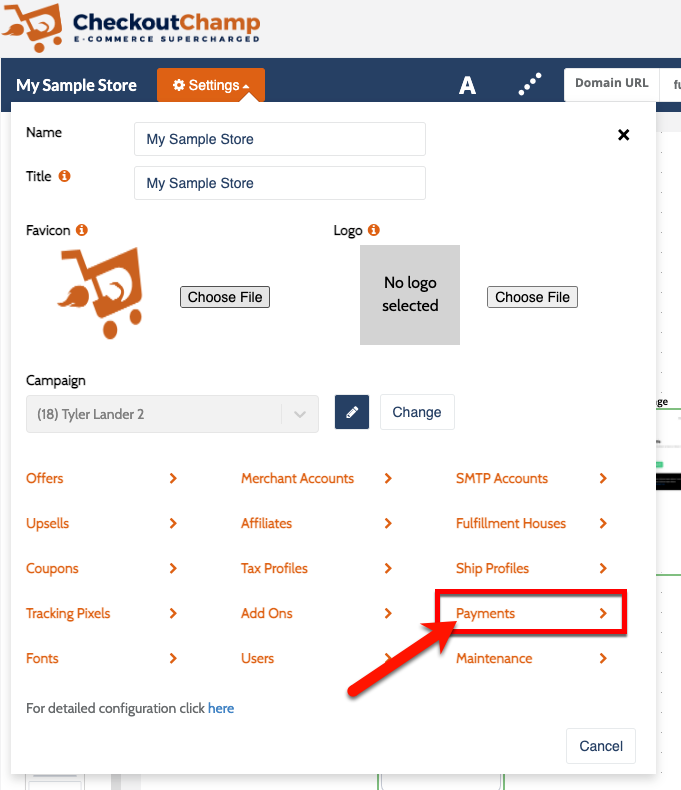
### Step 2: Click the gear button on the top left to open Settings <a href="#afterpay-checkoutchamp-step2-clickthegearbuttononthetoplefttoopensettings" id="afterpay-checkoutchamp-step2-clickthegearbuttononthetoplefttoopensettings"></a>

<figure><img src="/files/zDj6zQDEPcvrB2Qe1JMp" alt=""><figcaption></figcaption></figure>

***

### Step 3: Open the Payments section <a href="#afterpay-checkoutchamp-step3-openthepaymentssection" id="afterpay-checkoutchamp-step3-openthepaymentssection"></a>

<figure><img src="/files/TQ3km7U2IHEpUmfvs6JA" alt=""><figcaption></figcaption></figure>

***

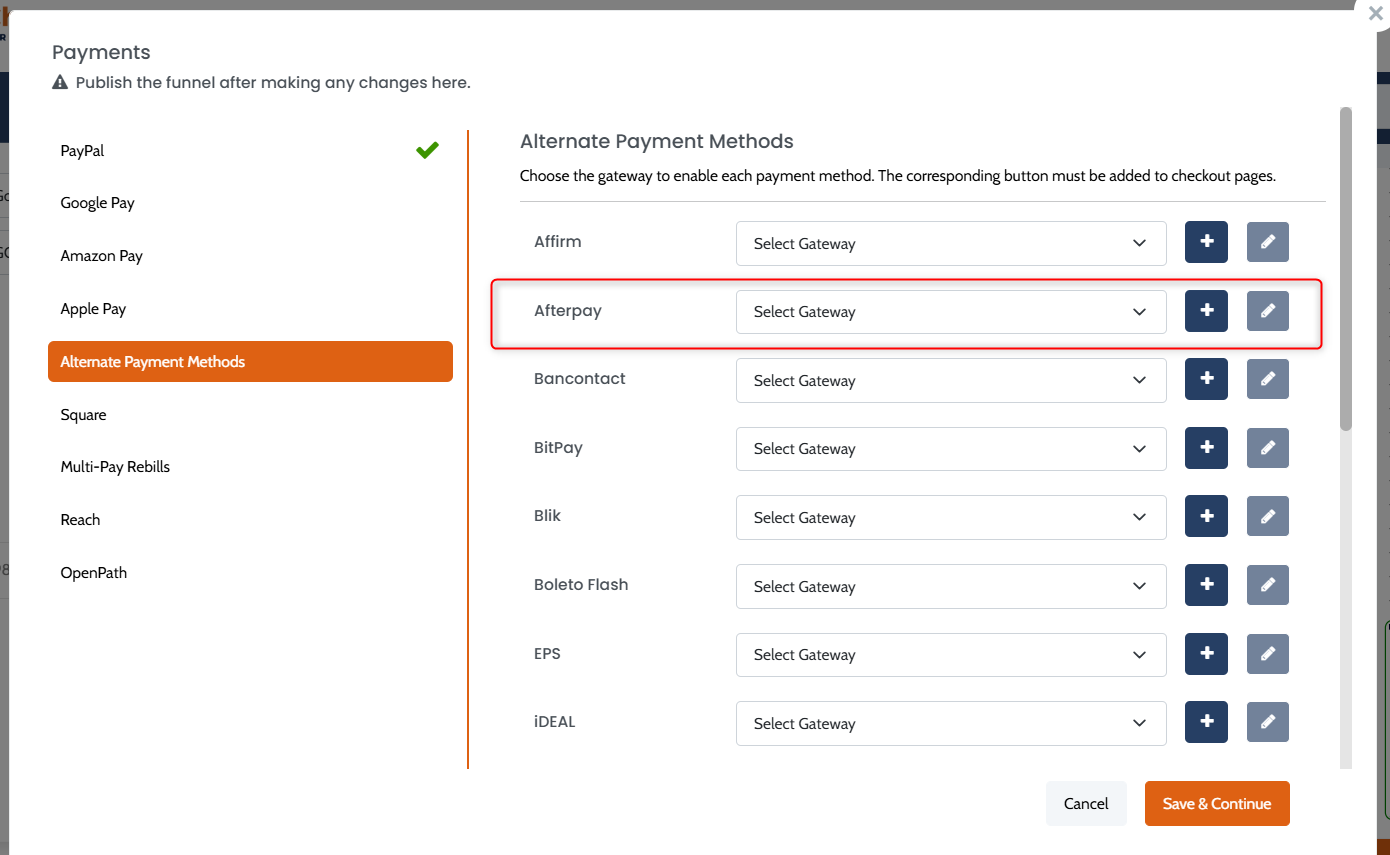
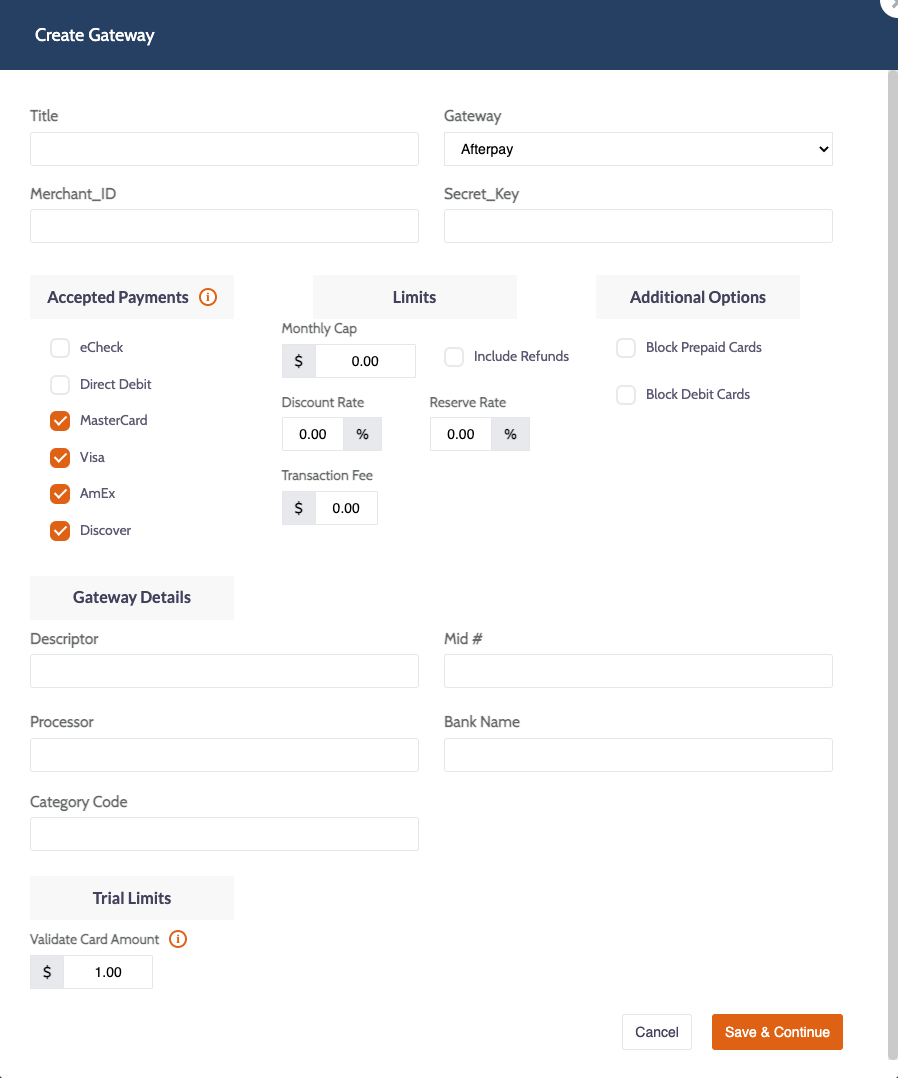
### Step 4: Add or select existing Afterpay or Adyen V2 or Stripe V2 gateway credentials <a href="#afterpay-checkoutchamp-step4-addorselectexistingafterpaygatewaycredentials" id="afterpay-checkoutchamp-step4-addorselectexistingafterpaygatewaycredentials"></a>

<figure><img src="/files/LKqIyldT9DUHIRB8ynhv" alt=""><figcaption></figcaption></figure>

<figure><img src="/files/EQwQ3yv2HIDPiYs1wMFV" alt=""><figcaption></figcaption></figure>

{% hint style="info" %}

* Enter a **Title** to easily identify your Afterpay account.
* **Merchant\_ID** - Found on the footer of the Home page inside your Afterpay account.
* **Secret\_Key** - This is emailed to the account owner upon the account's creation. If you are having difficulties finding this you can reach out to your Business Development Manager or you can reach Afterpay Merchant Support: <https://developers.afterpay.com/afterpay-online/docs/merchant-support>
* Add account **Limits**, **Descriptor,** and **Mid #**
  {% endhint %}

***

### Step 5: Save and Continue <a href="#afterpay-checkoutchamp-step5-saveandcontinue" id="afterpay-checkoutchamp-step5-saveandcontinue"></a>

***

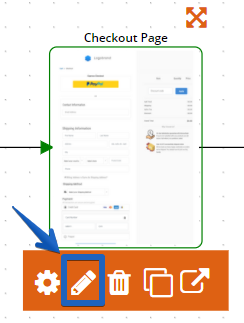
### Step 6: Edit Checkout page and add Afterpay button <a href="#afterpay-checkoutchamp-step6-editcheckoutpageandaddafterpaybutton" id="afterpay-checkoutchamp-step6-editcheckoutpageandaddafterpaybutton"></a>

<figure><img src="/files/tiY8CuIZ1gATBTNjRJCg" alt=""><figcaption></figcaption></figure>

<figure><img src="/files/eCoqpv2y4JVlKnY8ihSo" alt=""><figcaption></figcaption></figure>

***

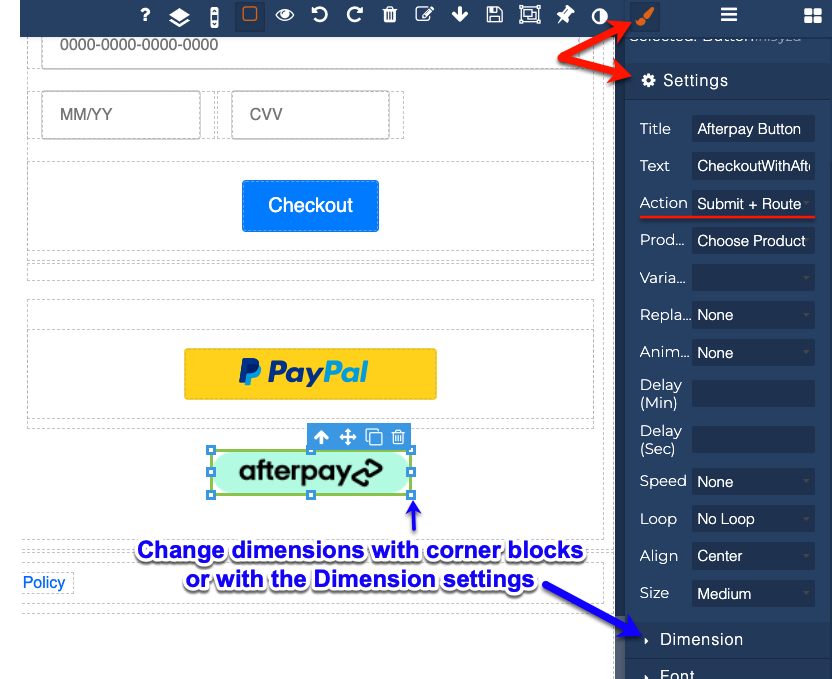
#### Step 6-1: Customize button size by clicking on the button and dragging the highlighted corners or use the Dimension tab for advanced edits. Under the Settings for the element, be sure the Action is set to *Submit + Route* <a href="#afterpay-checkoutchamp-step6-1-customizebuttonsizebyclickingonthebuttonanddraggingthehighlightedcorn" id="afterpay-checkoutchamp-step6-1-customizebuttonsizebyclickingonthebuttonanddraggingthehighlightedcorn"></a>

<figure><img src="/files/kXcljmNE3o0v31mjSbfV" alt=""><figcaption></figcaption></figure>

***

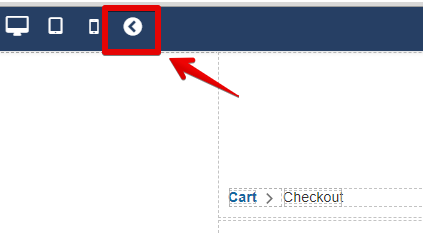
### Step 7: Save the page. Exit the page builder. <a href="#afterpay-checkoutchamp-step7-savethepage.exitthepagebuilder" id="afterpay-checkoutchamp-step7-savethepage.exitthepagebuilder"></a>

<figure><img src="/files/z6lSUjhpko3fZWT3ZBkU" alt=""><figcaption></figcaption></figure>

***

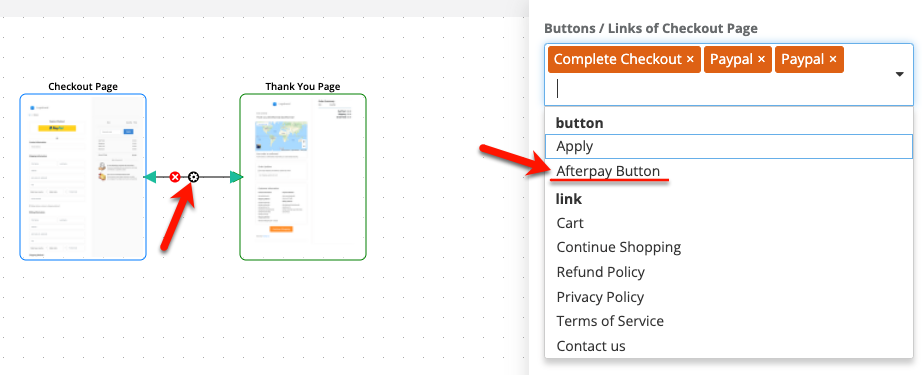
### Step 8: On the arrow leaving the checkout page, choose the Afterpay button. <a href="#afterpay-checkoutchamp-step8-onthearrowleavingthecheckoutpage-choosetheafterpaybutton" id="afterpay-checkoutchamp-step8-onthearrowleavingthecheckoutpage-choosetheafterpaybutton"></a>

<figure><img src="/files/eCh66Xu3QBz58QRmo2Kk" alt=""><figcaption></figcaption></figure>

***

### Step 9: Publish. You’re done and ready to test! <a href="#afterpay-checkoutchamp-step9-publish.youredoneandreadytotest" id="afterpay-checkoutchamp-step9-publish.youredoneandreadytotest"></a>

&#x20;


---

# Agent Instructions: Querying This Documentation

If you need additional information that is not directly available in this page, you can query the documentation dynamically by asking a question.

Perform an HTTP GET request on the current page URL with the `ask` query parameter:

```
GET https://help.checkoutchamp.com/funnel-builder/creating-and-editing-funnels-pages/funnel-visualizer-and-page-builder/funnel-visualizer/edit-funnel-settings/payments/afterpay.md?ask=<question>
```

The question should be specific, self-contained, and written in natural language.
The response will contain a direct answer to the question and relevant excerpts and sources from the documentation.

Use this mechanism when the answer is not explicitly present in the current page, you need clarification or additional context, or you want to retrieve related documentation sections.